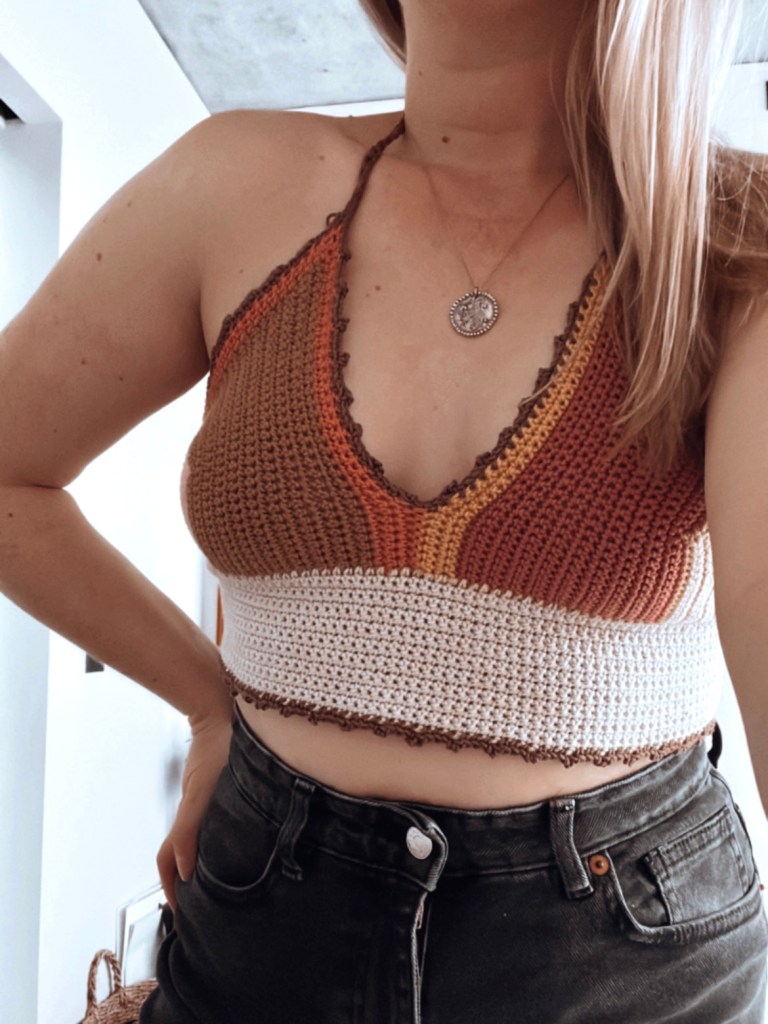
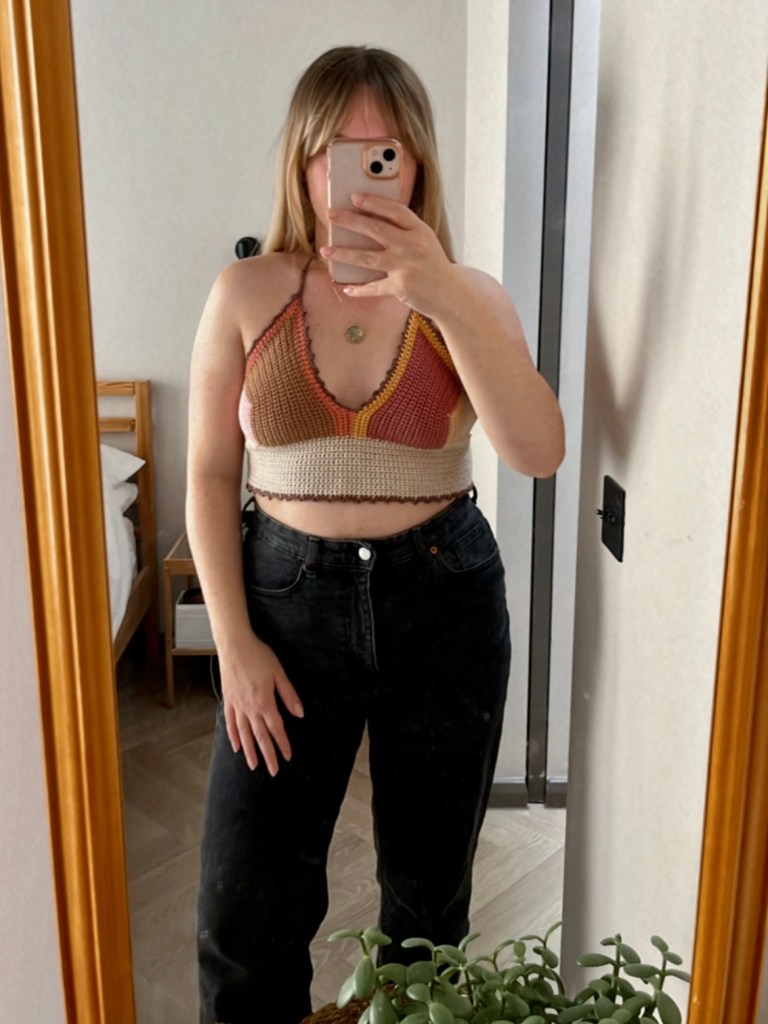
Simple crochet bralette – free crochet pattern
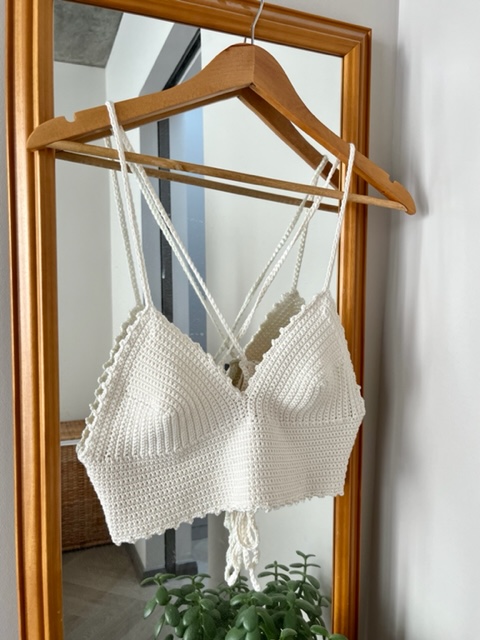
Picot edging elevates this easy to make crochet bralette to create the ultimate summer staple. This pattern is made to measure, so you can customise the perfect fit, and you’ll soon be making one in every colour!
What you will need:
- DK yarn. I would recommend using cotton or a cotton blend. I recommend both Paintbox Yarns cotton DK, and King Cole Bamboo Cotton blend.
- A 4mm crochet hook.
- Scissors.
- An embroidery needle to weave in ends.
Making the cups:
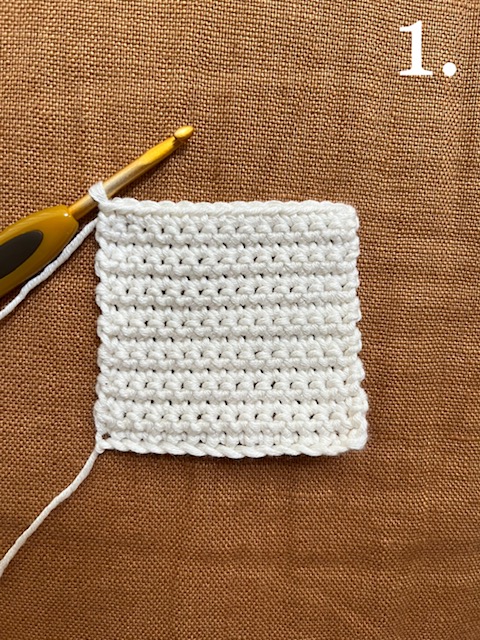
- Measure how wide you want the bottom of each cup to be. You can use a bra or bikini top to compare if helpful.
- Divide the number by 2, and ch until you reach this measurement. (note down the number of chs you did)
- SC along your chains to end of row.
- Ch1, turn, SC to end of row.
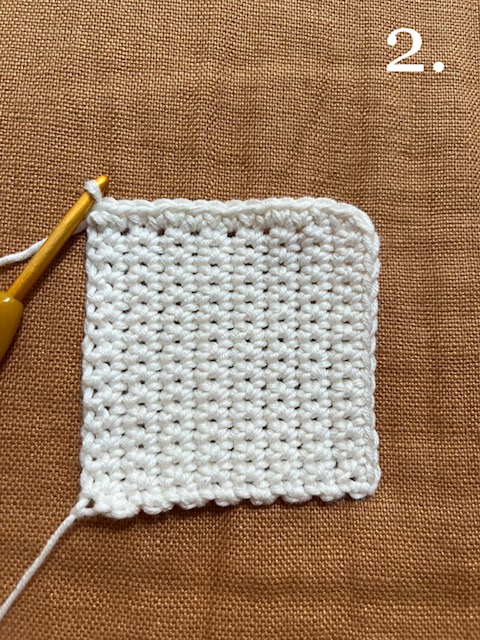
- Repeat last row until you crochet enough rows to create a perfect square – note down the number of rows you did. (photo 1.)
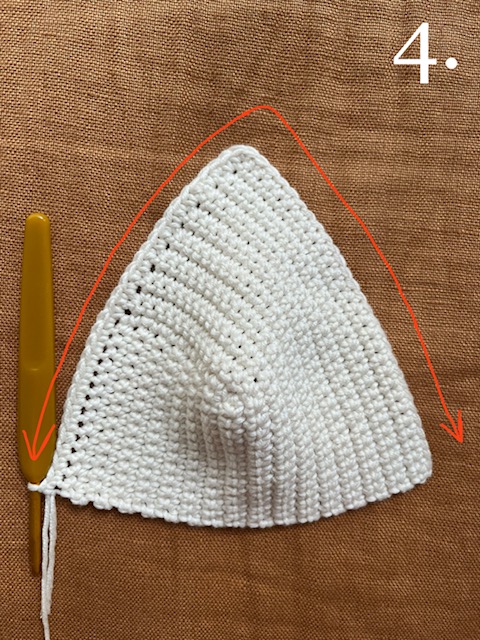
- Ch1, turn, SC to end of row. Now continue working along the next side of the square placing a SC for each row. (photo 2.)
- Ch1, turn, SC to end of row.
- Repeat the last row until you have completed the same amount of rows as the original square. (photo 3.) You can do a couple more/less rows depending on how much coverage you would like. If this is enough coverage, fasten off.

If you would like even more cup coverage continue here:
- SC to end of row (same as previous rows), then continue along the next edge.
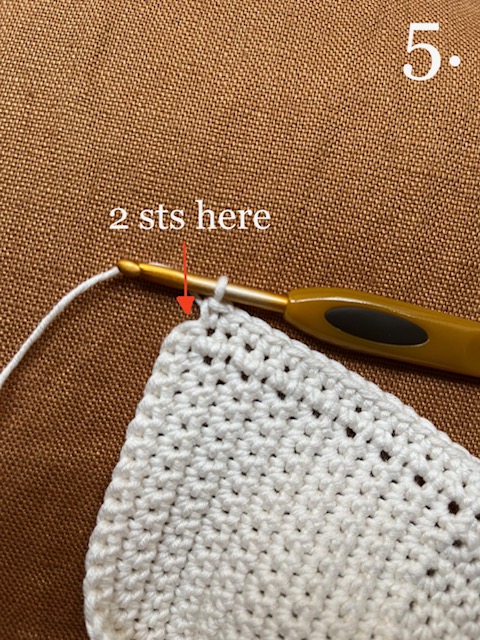
- Ch1, turn, SC along until you reach the st that makes the top point of the cup, in this st place 2SC (to increase), then SC along to the end of the row. (photos 4. and 5.)
- Repeat the last row until you reach your desired coverage. Fasten off. (photo 6.)

- Repeat the above steps again so you have 2 identical cups.


Joining and adding length:
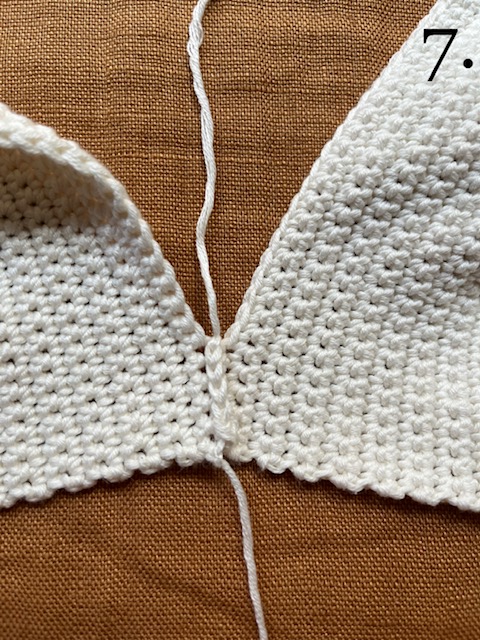
- Now you have 2 identical cups, place them next to each other so the first squares you started with are on the outsides of the cups (make sure the rows are going in the same direction). We will now join them together in the middle.
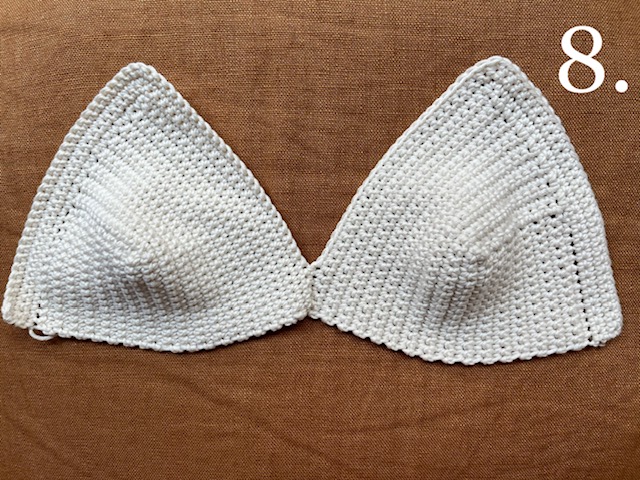
- To do this, SC the cups together in the center, starting from the bottom (I did about 5 sts up). Fasten off. (photo 7. and 8.)
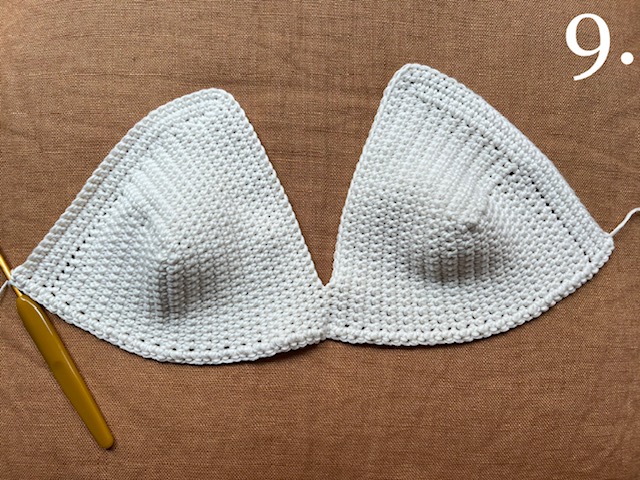
- Join your yarn in one of the bottom corners of your cups and SC along the bottom of both cups (photo 9.)
- Ch1, turn, SC to end of row
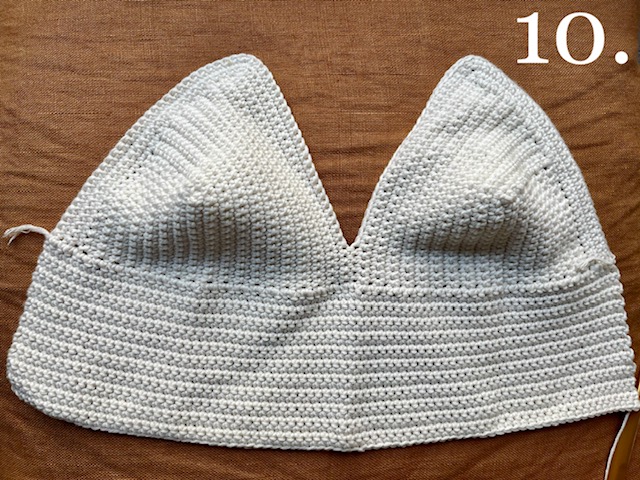
- Repeat last row until you have about 3-4inches of length. Don’t fasten off. (photo 10.)
Side panels:
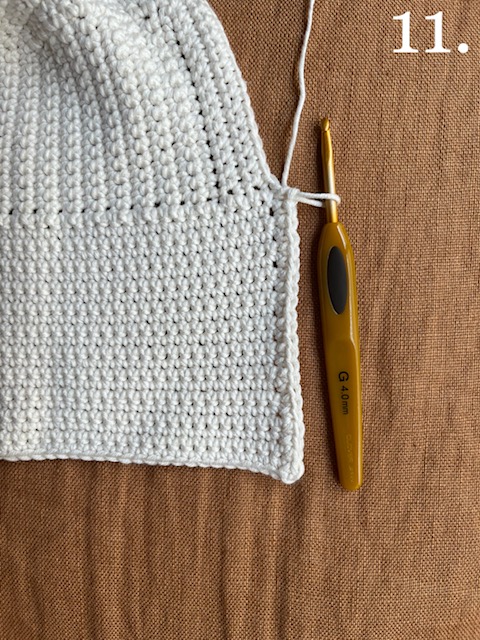
- Rotate your work, and now SC up the side of the panel you just created, and stop when you reach the bottom of your cup (photo 11.)
- Ch1, turn, SC to end of row.
- Repeat last row until your side panel is long enough to come around your side and towards the center of your back. Do not create this section too long as it will stretch when you wear the top.
You now have two options for the straps. Option 1: you can have a long tie coming from the top of each of the cups, which cross over on the back, feed through the side panels and tie up around your back. Or Option 2: a tie coming from both of the cups which tie around your neck, and a tie coming from each of the back panels which tie up around your back.
Option 1 side panels:
- For the last row, turn your work, Ch3, sk 2, SC until you reach the two middle sts of the row, Ch3, sk 2, SC until you reach the last two sts, ch3, SC in last st. Fasten off. You should be left with 3 holes for your straps to be fed through. (photo 12.)
- Join your yarn on the other side, and repeat the above step to create a second side panel.

Option 2 side panels:
- For the last row, make sure you are starting from the bottom of the panel going up. Ch3, sk 2, SC until you reach the two middle sts of the row, Ch3, sk 2, SC until end of row. Fasten off. You should be left with 2 holes (one at the bottom, and one half way up your side panel) for your straps to be fed through. (photo 13.)
- Join your yarn on the other side, and repeat the above step to create a second side panel.

Staps and finishing:
- With the right side facing you, join your yarn into the top of the right cup.
- For option 1, ch until the length is enough to go around your neck and through to tie up at the back (I did about 200 chs).
- For option 2, ch enough length to go around your neck (I did about 100chs).
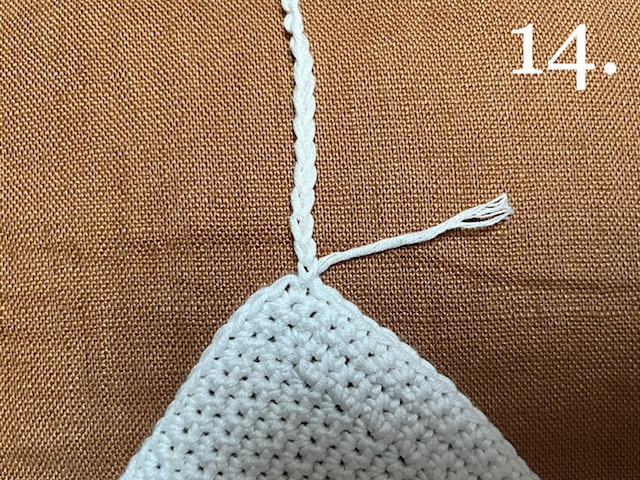
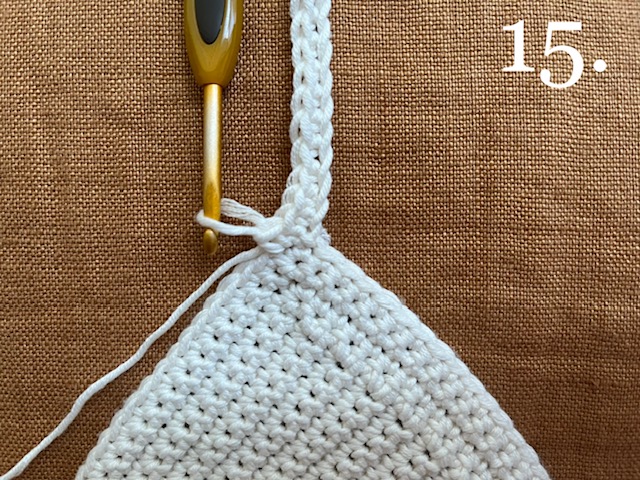
- SC back along the length of chs you just created. (photos 14. and 15.)
- SC into the next st on the cup, SC in next 2 sts, ch3, sl st into first ch. (This is called picot edging).
- SC into next 3 sts, ch3, sl st into first ch. Repeat this until you reach the top of the next cup
- Once you get to the top of the next cup, work the same amount of chs to create a strap the same length as the one made previously.
- Continue with the picot edging around your top until you get to the side panel where the holes start.
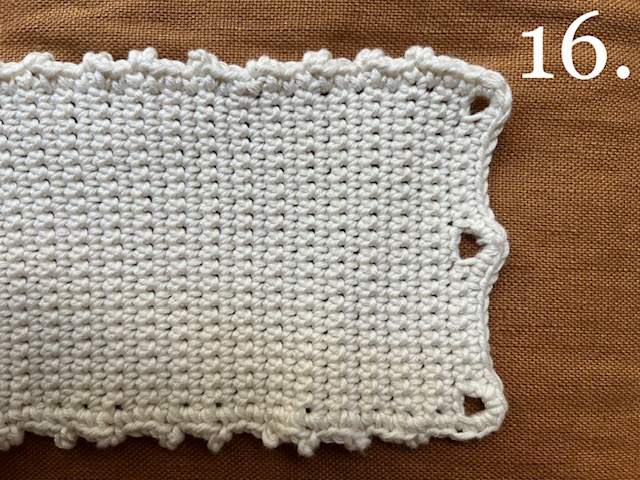
- For Option 1, SC along the edge, placing 3SC into each of the three holes. (photo 16.)
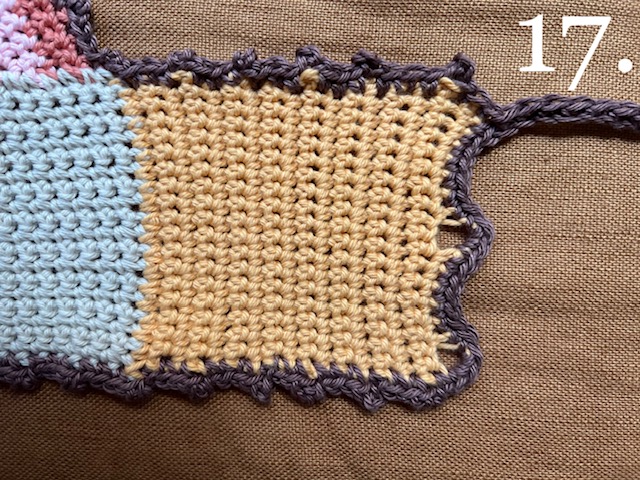
- For Option 2: ch enough length to criss-cross to the other panel and tie up at your back (I did about 150 chs). SC back along the chs, and then SC along this edge, placing 3SC into each of the two holes. (photo 17.)
- Move along to the next edge, continuing with the picot edging until you reach the next side panel where the holes are.
- For Option 1: SC along the edge, placing 3SC into the three holes.
- For Option 2: place 3SC into the first hole, SC along edge to next hole and place 3SC in there. SC to the second last st of this edge, and ch the same amount of sts as you did the the previous strap. SC back along the chs, SC into last st on this edge.
- Move along to the next edge, continuing with the picot edging until you reach the first strap where you started. Sl st into first st and fasten off.
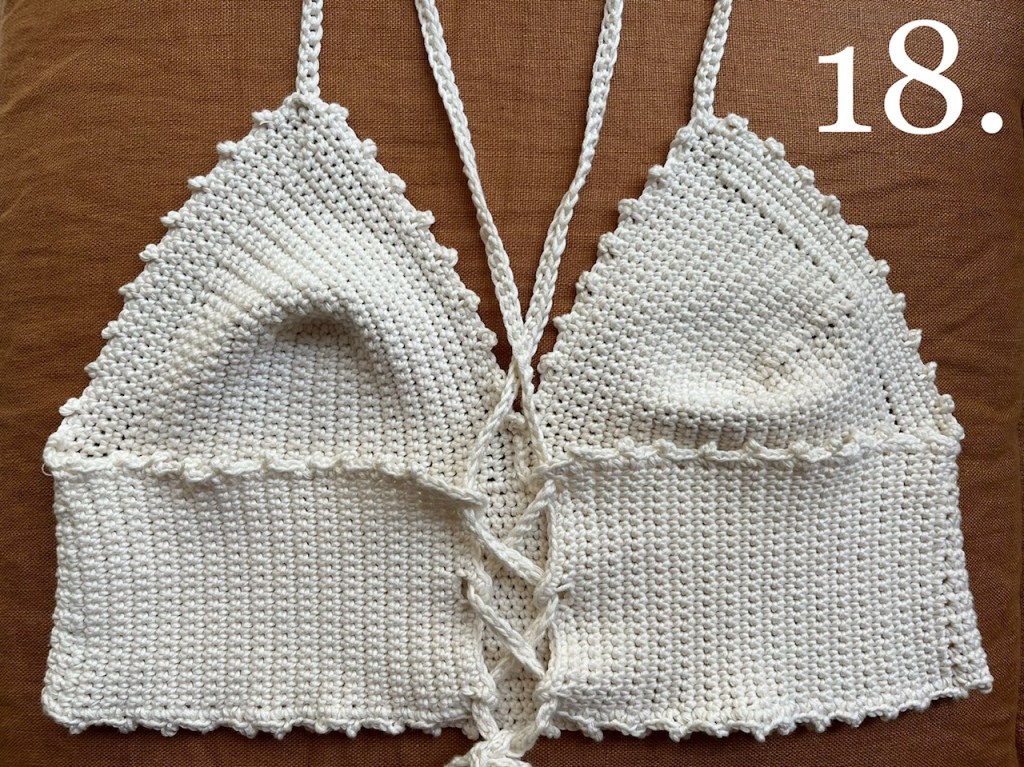
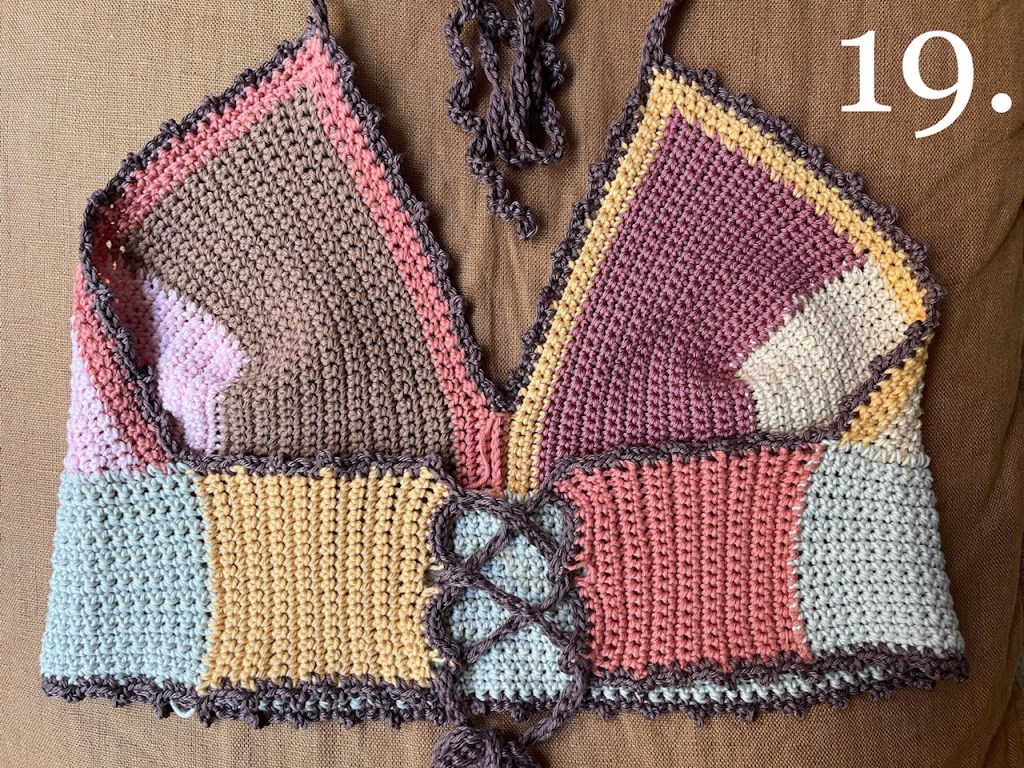
- You can see how to tie the different options below. Option 1: photo 18. Option 2: photo 19.
- Weave in your ends using an embroidery needle, and you’re finished! For a simpler design you can just do a SC edging instead of picot.
I hope you enjoyed making this simple, crochet bralette.